Saturday, August 27, 2016

About the Recipe: Jesse's Whole-Grain, Gluten-Free, Sweet-Potato & Salmon Doggy muffins


Jesse will turn 4 on the 30th; and I’ve been planning his birthday treats since I finished making Presley’s Pupcakes. Now, like our youngest furbaby, these treats are somewhat complex. As you’ll soon see (if you haven’t already looked over the actual recipe), there’s a lot going on in these treats—so much, in fact, that I’ve separated out the gluten-free baking mix into a different post (click here to read over that section).

And if you haven’t looked over the ingredients list yet, you’re going to think I’m crazy when you do (especially if you check out the baking mix, also). These treats kind of had me stressed out a bit—as I’ve never actually took the time to figure out gluten free baking; and while I’m still not a master, I can say that I’m happy with the way they’ve turned out—at the end of the day, I have two very happy dogs who probably wish I’d let them gorge themselves on these treats instead of rationing them out so they don’t get sick or too fat.

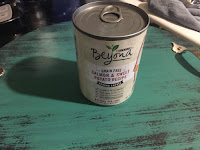
The inspiration for this recipe comes from a canned dog food that I happened to purchase at random one day. It’s Purina’s Beyond Salmon & Sweet Potato Recipe Ground EntrĂ©e; and Jesse’s reaction to this new food was positive enough for me to notice. Even though Jesse’s tweet of appreciation didn’t get much of a reaction from Purina (i.e. they didn’t send us any or pay me in any way to promote it), I stored the information in the back of my head for future use…and this is that use—Jesse’s Barkday Treats.

I’ve used sweet potatoes in treats before since they’re perfectly healthy for dogs and help aid digestion and provide healthy fiber. Also, the flavors in sweet potatoes pair really well with the warm spices—like cinnamon and ginger—which I’m fond of using in their non-savory treats anyway (these are made sans cinnamon as they’re more savory). Additionally, and not to get too graphic here—but if your dog is constipated or you’ve noticed he/she is straining when going number 2…sweet potatoes can help her/him out in that regard (as does pumpkin).

Now, I don’t normally make savory treats; and that’s, honestly, because I feel weird about incorporating meat or a meat product into a baked good (it’s kind of the same reason I’ll never try baby food that has anything in it other than mashed fruits). I’ve done it before using chicken, and the saving grace there was that I used canned chicken which seemed a little bit better—for whatever reason—which is the main reason I opted for pouch salmon in this recipe. Now, I know that I should have bought fresh (or even frozen) salmon and cooked it myself if only to help control the amount of sodium and preservatives in the recipe; however, I’ve never cooked salmon before and don’t have a desire to learn how to, either (which probably means I’ll be doing it next week).

So, I used pouch salmon; and feel free to cast all the shade you’d like over that fact. Feel free to cook that salmon yourself and email me with your bragging rights after you’ve made this recipe—I’d accept that feedback, gladly.

Like I said, I used pouch salmon; and for its ease of use (no draining—just rip it open and scoop it into the bowl), I’d encourage you to do the same; however, I understand if you’re planning on using canned salmon that you already have in your pantry. If that’s the case, drain it over a bowl and reserve the liquid before you start to make this recipe. If it’s packed in water, use it to offset some of the other liquid in this recipe; and if it’s packed in oil, use it instead of some of the olive oil.

If you read over the recipe posted below, you’ll notice that I took care to write in the prep work and note that it should all be done prior to mixing any of the ingredients. An important thing about baking and especially gluten-free baking is to have your prep work out of the way before you begin since it’ll make it all go smoother; and this recipe has several components— to say the least. Your mixture will not wait on you to cook the quinoa or sweet potato if you forget; and they both need to cool completely before you begin since it could trigger the cooking process if you use them hot or even warm.

Now, it’s important to know that salmon and sweet potato were the only two ingredients I absolutely knew I was going to use when I was in the planning stages of this recipe. The gluten-free component came into play after I realized that I was somewhat trepidatious about baking that way for real; and in this instance, I decided to face that “fear” head on by not only using gluten-free flours but also whole grain flours at that.

Despite the fact that my baking mix calls for a kilo of flour, I only used 280 grams of my whole-grain, gluten free baking mix in this particular recipe. With some quick math, that leaves me with 720 grams of mix to store in my freezer until I get this itch to bake gluten-free again (which will probably be kinda soon as space in my freezer comes at a premium). Why did I mix a kilogram of baking mix when I only needed 280 grams, you ask…Well, the guide I used for that mix called for 1000 grams and it called for 700 grams of whole grain flours mixed with 300 grams of starches/lighter flours…and I was too intrigued (i.e.: afraid), truthfully, to scale that down.

280 grams may seem like an odd figure to you; but as I talked about in the about the baking mix section, different flours weight differently. A cup of regular, all-purpose flour weighs 140 grams; and I developed this recipe based off of a two-cup measure—thusly arriving at 280 grams. Now, why do I mention two cups and don’t actually measure that way—well, quite simply, 1 cup (measured and leveled like I would do for all-purpose white flour) of my baking mix actually weighed 153 grams by itself. Precision is important when dealing with flours that don’t behave or weigh the same as regular flour.

So after I made the decision to make these muffins gluten free (and btw, I’m referring to them as muffins because I elected to not use cupcake liners), I knew there were several factors involved with gf baking that I would need to overcome. GF flours tend to make baked goods dry and crumbly. Enter the quinoa.

Other than being a super food, quinoa acts the same way as oats in that they make baked goods moist—or they absorb and retain moisture when used. They also add another grain to the mix and make the muffins that much more filling overall. In this recipe, the yogurt kind of takes the place of buttermilk in a more traditional cake or cupcake—it, too, helps keep the cakes moist whilst baking.

Ground chia mixed with broth
Ground (cha-cha-cha) chia seeds (yes, the same that you’d use to grow a “pet” of the same name) help with binding and thus making the mixture less likely to crumble when it’s baked. The reason I used finely ground chia seeds (and purchased a mortar and pestle to grind them myself) was because when mixed with water form a slimy mixture which can be used to replace an egg. Eggs are a binding agent, also; however, I felt that I’d used enough eggs with 1 egg and 1 egg white (that extra egg white was also used to help combat crumbling) that I wanted to use the ground chia seeds as an alternative for an additional egg—eggs are safe for dogs to eat; and 1 isn’t a problem…but two felt like I was adding too much fat.

Yes, I did this by hand
The reason there’s additional (slightly ground) chia seeds mixed into the dry mixture is because it was the remainder of the small package that I’d purchased at my big-box retailer while walking through that isle and becoming infatuated with the idea of using them in a treat. Yes, I’m fully aware of how ridiculous I am—or that sounds—but, you know, I think I’ve made something kind of wonderful here and it was because I maintained this attitude throughout this process.

I researched and became fascinated with different products. It’s the same reason I bought the agar agar powder; and despite the fact that I didn’t use it, I’m not disappointed with that purchase and plan to use it in another recipe at another time. Just because I didn’t need to use it in this mix, doesn’t mean it was a waste.

And while it may appear that I just chose my gf flours at random or because of their easy availability, I actually didn’t. I read up on all the flours and tried to blend them to create almost the perfect mix for this purpose. For example, the sticky factor is why there’s glutinous rice flour included—to help prevent the need for the dreaded xanthan gum; and after purchasing most of the flours and continuing to read about them, I discovered the chia seed resource. As a side note, ground flax seeds help bind ingredients as well; however, I’m already familiar with flax seeds and have used them before whereas I’d never used chia seeds prior to this endeavor.

All in all, I’ve made dozens of cakes and other baked goods throughout the years; and I didn’t want to throw out that experience when attempting this kind of recipe despite the fact that gf baking is a lot different than regular baking. By this point I realize that this recipe is really my way of adapting a regular muffin recipe to overcome the challenges presented with gf free flours; and I think it can be useful for others to read it that way, also.
The flavorings—ginger, dill, parsley, and lemongrass powder—were all selected as they’re sort of the traditional parings with salmon. Dill and parsley also help dog’s breath while ginger and lemongrass powder have other health benefits (lemon and lemon juice aren’t as good for dogs, generally speaking). I went the lemongrass route because I had it from my Asian Market adventures otherwise I would have used lemon balm from my garden again. Also, I used dried parsley this go around because something ate the last of mine in my garden.

To increase the savory aspect of this recipe, I knew I wanted to use broth or stock in place of water; and I actually cooked the quinoa in it and mixed it into my chia seed slurry also. If you don’t want it or can’t find one that’s gluten free, simply use water as an alternative. Being gluten free wasn’t something I was worried about with the broth—I was more concentrated on the sodium content. The broth I chose was unsalted and had the least amount of sodium per serving that I could find in the store; however, last night when I was thinking about it, I realized that flour is a typical thickener.

After a quick 11th hour Google search, I realized that flour isn’t usually the problem; instead, it’s the yeast that could contain gluten. While some yeast components have gluten or aren’t considered gluten free, the particular one the broth contained is considered gluten-free. Now, if you’re thinking it’s strange that I almost freaked out about that, it probably is; but I was aiming to be as authentic as possible.

If you pay attention to the directions in the recipe, you’ll see I mention scrapping the bowl and making sure everything is incorporated. In my reading, I found that it’s a common problem that the flours don’t incorporate as easily as regular wheat-based white flour—which is one of the main reasons I chose to use a mixer in the first place. One of the benefits of gluten-free baking is, however, the lack of gluten after all; which means that you can mix until your heart is content without worrying about too much gluten forming and making your baked good tough.

going in the oven...
On that note, if you do any amount of baking you’ll probably notice that there’s quite a bit of baking powder and baking soda included… gf recipes require more leaveners to get a similar result as using wheat-based flours. And with the acidity from the yogurt, I decided to add baking soda as well as just powder.

...and coming out
The baking part went off without a hitch. I was very sure to spray my pans really well as gf products are known to stick; and I used a coconut oil spray because I had it. It worked really well even without spreading extra flour on the tins. If you want a little bit more insurance, you can sprinkle a little of the flour mix in your cups and tap it around…or you could also use cupcake liners.

Super moist and cakey
Onto the icing. Another common pairing for salmon is cream cheese; and I knew that’s where I wanted to go with the icing. It couldn’t have been simpler either. The tapioca flour helps stiffen the recipe (and is used in the recipe anyway); and kind of helped it fluff up in a similar way as powdered sugar would—but that much sugar isn’t good for dogs and wouldn’t have paired well with this very savory muffin. I incorporated dill and parsley since I figured the green flecks would be kind of appealing; and in the end, I think this icing would also be pretty good as a vegetable dip.

Yummy with or without icing
Overall, I was very happy with these treats. The muffins were light and fluffy; and they looked really good and kind of pretty straight out of the oven (the tops were crackled as if they had a topping). The boys have gone crazy for them (they entered the kitchen as soon as they smelled the broth boiling with the quinoa and barely left throughout the entire process). On a difficulty rating—now that they’re done, I’ve give them a 7 mostly because of all the steps; however, as I said before, having everything mapped out helped keep things going on track. I think these could be good made with white flour, too; however, it would have to be converted back.

If you try this recipe, I’d really enjoy hearing from you; and I’d especially like to hear from you if you’d like me to try another gluten-free recipe or have an idea for one. As always, I welcome question and comments alike and feel free to contact me using the social media links to the right; and be sure to follow Jess on Twitter @jdawg_yellow—at least wish him a happy birthday on Tuesday!

They even helped with clean up...

Jesse's Whole-Grain, Gluten-Free, Sweet-Potato & Salmon Doggy muffins


Yields: 20 muffin treats

Muffin Ingredients:

2/3 cup uncooked quinoa
1 whole sweet potato approximately 1 lb in size
¼ Cup + 1 TBS Chia Seeds
280 Grams (a scant 2 cups) WG, GF Baking Mix (recipe below, or click here) or your own favorite all purpose GF baking mix
3 tsp baking powder
2 tsp baking soda
1 whole large egg + 1 egg white
¼ cup olive oil
¾ cup plain (non-Greek) yogurt (low or no fat preferred)
1 ½ cups unsalted broth chicken
2 tsp ground ginger
1 Tbs lemongrass powder
2 Tbs Turmeric powder
1 tsp dill
1 Tbs parsley
2- 2.5 oz packages/containers pink salmon

Icing ingredients:

1-8oz package cream cheese (room temperature)
¼ cup plain (non-Greek) yogurt (low or no fat preferred)
¼ cup tapioca flour/starch
1 tsp dill
1 Tbs parsley

Directions:
Preheat oven to 350 degrees Fahrenheit.  Thoroughly spray or grease muffin tins and set aside.

Prepare Quinoa: in a medium sauce pan combine the quinoa with an equal amount of water or broth and bring to a boil. Then cover, reduce heat to simmer, and cook for 15 minutes. After 15 minutes, remove from heat and fluff with a fork. Set aside and let cool.

While the Quinoa is cooking, wash your sweet potato (if you haven’t already) and poke at least 3 times on each side with a fork or knife. Then place on a microwave-safe plate or bowl and microwave for 5-8 minutes or until fork tender. Set aside and let cool.

If using whole chia seeds, take 1 tbs spoon and grind with a spice grinder or mortar and pestle until fine. Then mix with 3 tablespoons of water or broth until moistened and let sit at least 5 minutes.

Then grind the rest (1/4 cup) of the chia seeds lightly—just to break them down a little. After you’ve ground them, mix the ¼ cup chia seeds in with the gluten-free baking mix and baking soda and powder. And set aside.

Once the sweet potato is cool, cut it down the long side and remove the skin by scooping the flesh into the bowl of an electric mixer. Using the whisk attachment of your mixer, turn mixer to medium to fluff the sweet potato while you add the 1 whole egg and extra egg white. Add the finely-ground chia seed mixture (the 1 tbs ground chia mix) and continue mixing until well incorporated. Be sure to turn off the mixture and scrape the sides with each addition. Turn the mixer to low and add the olive oil, yogurt, ginger, lemongrass powder, turmeric, dill and parsley and mix until well combined. Then add the 1 ½ cups chicken broth, salmon, and prepared quinoa and turn mixer back up to medium until everything is very mixed.

Again, turn mixer to low and slowly add dry ingredients (GF flour mix, chia seeds, baking soda and powder). Once the mixture starts to come together, turn mixer back up to medium high and mix until you’re certain everything is very well incorporated.

When certain that there are no pockets of dry ingredients, turn off mixer and remove bowl. Scrape down sides and use a spoon or spatula to stir the mixture several turns before scooping into prepared muffin pans. Fill until just below the rims of cup and place in 350 oven for 25 to 30 minutes or until a toothpick inserted comes out clean. Muffins should be slightly raised and spring back when touched.

Let cool completely.  

To make the icing:

Mix all ingredients until well combined. Once muffins are cooled completely, pipe or spread evenly on desired treats.

Serve treats immediately or store in the refrigerator in an air-tight container for up to a week. Freeze any treats which will not be eaten within a week for up to three months.  

Check out the About the Recipe section for more detailed instructions.

Whole-grain, gluten-free baking mix recipe/about the recipe:


My blend


 Ingredients:

290 g sorghum flour
260 g brown rice flour
150 g buckwheat flour
125 g tapioca flour
125 g glutinous rice flour
 50 g potato flour

Instructions:
Measure, mix

Yield:
1kg baking mix

About:
The above recipe is actually a stand-alone ingredient—and it’s just one component in another very involved recipe. I’ve blended it for use in Jesse’s Whole-Grain, Gluten-Free, Sweet-Potato & Salmon Doggy Muffins.

I remember telling you that I don’t give two shits about gluten-free (gf) crap…and here I am developing a gluten-free dog muffin/pupcake recipe. I’m not going to lie here, I’m still not sold on gluten-free baking—and trust that we’re not transitioning to a gf household (I love my sourdough starter too much); however, I do enjoy a bit of a challenge. This is technically part 1, although, you’ll probably read it last or never.

At any rate, this is the first part I wrote; and I typed most of the following last night before I made any muffins. So, you’ll need to excuse the tenses and the fact that I didn’t know if this would work. However, now that they’re out of the oven and several have been consumed by both of my dogs, I’d call it a success and will be using this mix for my future gluten-free endeavors; and I’ll talk more about it in the next post.

If you’re not a gf expert, I would definitely suggest checking out this website and this one before proceeding. Both provide an invaluable amount of guidance for going in that direction. And if you’re thinking about blending your own gf flour mix, this is where I got the basis for my whole-grain, gluten-free baking mix.

As an experienced white-flour and a novice whole-wheat flour baker, I was under the mistaken impression that going gluten free was as simple as swapping one flour for another and add a bit of xanthan gum; however, it’s not. If you checked out any of the links above, you’ll quickly learn, as I did, that it’s best if you blend a number of different gf flours since each flour behaves differently when combined with other ingredients. By blending the fours, you’ll not only take advantage of their different flavors but also help augment the properties of the mixture to end up with something that performs more like regular, all-purpose white flour.

Also, I found that it’s not all about the flours when going gluten free—it’s also about the starches. Potato, tapioca, and corn starches as well as arrowroot are almost essential to lighten some of the heavier flours to ensure success when baking gluten free. FYI: Tapioca flour is the same thing as tapioca starch; however, potato flour is not the same as potato starch. Also, glutinous rice flour doesn’t have gluten in it—it just means that it’s “sticky”.

And back to xanthan gum… Xanthan and guar gums help gf free flours bind together in the same way gluten would; but they can also cause digestive issues and have their own allergy warnings. Even thought I don’t know that it will affect them, I wanted to steer clear of digestive issues with my boys. Also, as I’ve previously mentioned, I’m somewhat prejudiced against xanthan gum—and no, I don’t care that I’ve never used it or don’t even know that it’ll be a problem before I chose to exclude it (I don’t think it’s healthy to just like—or try—everything). I will tell you that xanthan is readily available by itself or as a part of most “off the shelf” gf all-purpose baking flour mixes; so if you decide to go the easy way (and this time I wouldn’t actually shame you for doing so), you’ll probably be using it.

A note about the easy way and why I won’t shame you: at this point, I don’t know that my whole-grain, gf baking flour will work or even produce something which will be edible. I’ve done my best to research my flours and follow the guide for how to blend them (ratios of whole grains to starches and other flours), but I know I’ve chosen the more difficult and less definite route. I don’t mind taking the risk; and I’m a fairly, experienced baker—so this is a challenge I’m willing to take. Plus, the search for all the different flours (more on that later) listed in my mix was fun, for me; and a novel occurrence for my mom who accompanied me during my hunt.

Back to the gums… If you are plagued by digestive issues yourself or know that your dogs are sensitive to xanthan or guar gums or if you are and don’t want it in your house or if you’re prejudiced like me, there are alternatives—several of them actually and probably more than I researched. One is gelatin—not the jello mix kind, but the plain kind like you’d use if you were making homemade marshmallows. Another is agar agar powder which is a vegan, gelatin-like substance derived from seaweed and what I’ve opted to purchase. (post-script note: I didn’t end up using any check out the about the recipe for Jesse’s WG, GF, Salmon & Sweet Potato Doggy Muffins to see why it was omitted).

Note: gelatin is not vegan because it’s made out of the skin, bones, and connective tissues (and sometimes hooves) of animals like cows—if you live in a vegan household and don’t like the gums and are reading this for tips on gf baking for yourself (or have never known about gelatin before and now that you do—yuck), agar agar powder (I’m not actually sure if the repeated agar is necessary, but I’ve seen it listed that way multiple times) will be a good, tasteless alternative for you to explore (it doesn’t taste or smell like seaweed).

If this is about baking for your dogs, the fact that it’s vegan really won’t matter as your dog is a carnivore by nature and an omnivore from centuries of meddling on the part of humanity (yeah, that comment is a direct result of a documentary we watched a few days ago about the origins of dogs and how they became domesticated). I know I’ve made a lot of vegetarian and even vegan treats before (all of my proceeding recipes posted have been meatless), but that’s mainly because I’m concerned about keeping the treats I make as “clean” and lean as possible. My boys are not vegan—hell, Jesse is roughly a quarter wolf. They had our left over steak last night and lamb is one of the main ingredients in their regular dog food. Treats are meant to supplement their diet and are only offered as an occasional diversion to their normal food or as a reward or because one of their daddies is a chump (not really) and likes to spoil our boys…

In short, I went with the agar agar powder because I liked the sound of it; and I was able to buy it from the bulk spice section of my local natural market.

If you take care to blend your flours and ingredients, you may not need any gums (or their alternatives) at all if you include enough of the “stickier” varieties or use extra binding agents like ground flax or (cha cha) chia seeds (more on that later, as well).

The day I’d planned to hunt for flours my mom was jonesing for a distraction from my other siblings, so she came up and went hunting for gluten-free flours with me. Truth be told, it probably would have been cheaper to have purchased a pre-mixed all purpose gf flour blend, especially considering my local natural market had it in the bulk section right next to all the other flours I bought in bulk (not to mention I only use a fraction of it in the actual anticipated recipe).

If you go the whole grain route, you’ll probably have to buy the flours separately; and if you do, I’d definitely encourage you to skip the urge to buy those pre-packaged bags sold off the shelf and head directly for the bulk section. I found sorghum, brown rice, and buckwheat (which doesn’t contain wheat, fyi) flours all reasonably priced in bins where I had to scoop it in a bag myself. I’m a fan of the bulk section not only for the price but also because it allows you the opportunity to only get what you need or want.

The tapioca flour/starch I already had and purchased from the ever so interesting Asian market just down the road from my house. This is also where I turned to find buy glutinous rice flour. Both packages are covered in writing I’ll never understand or be able to interpret myself; but they were both incredibly cheap at this source (right around $1.29 per pound which beats the $2.00+ price point of even the bulk section of natural market) as both of these products are common components of Asian cooking and baking.

I also bought a package of potato flour at the natural market since I didn’t find it in bulk; and while I only used a little bit of it (mostly because I bought it), it’s one of the heavier flours and better for breads than it is for cakes and muffins. After some more (internet-based) research, I’ve found that it does help keep things moist; so I figured I’d give it a go. All in all, it’s the flour I used the least—only 50 grams—and you could probably do without if you do so choose.

Now is probably a good time to tell you what else I found out about gf flours and why there are weights in this section and not good ole fashioned volume measurements. As we’ve already touched on, gf flours all have different properties like taste and how they absorb moisture; and, well, they all weigh differently, too. So volume doesn’t really help us out when we’re working with them since a cup of very fluffy tapioca starch is not really the same amount as a cup of the more dense buckwheat flour.

Most bakers will tell you that precision is key when it comes to baking as it’s science; and the most accurate way to bake is by weight—be it grams or ounces (I’ve opted for grams because the wg, gf baking mix guide I used is in grams—and my kitchen scale has a button on the bottom to switch from imperial to metric). Originally, I purchased my kitchen scale at the closest big box retailer in order to properly feed and maintain my sourdough starter; and I like the results when weighing out my ingredients. Since I’m new to gluten-free and am wanting to be as successful as possible, I’m going to weigh out my flour mix into my recipe; however, since I don’t have a viable solution for if your egg isn’t as big as my egg, the flours are the only thing that’ll be weighed.

Just for the sake of posterity (and mostly if you’re opting not to read the guide I did for mixing your own flour mixture), the whole grain flours are sorghum, brown rice, and buckwheat flours; while the regular flours are tapioca, white rice, and potato flours. The amounts used of each were slightly dictated by the amounts of which I purchased since I didn’t measure them as I was gleefully scooping them into their bags from the bins of the bulk section—which accounts for why it’s only 290 grams of sorghum flour and not a round 300—I didn’t have it… and I made up for it with 10 extra grams of brown rice flour.

I know I’ve been making light of this whole gluten free baking experience and that’s because this is all really just an experiment for me; and it’s fun because I’m not, nor is anyone else in my household, gluten intolerant. For those of you who are or are wanting to bake for someone who is or if your pet is, I feel for you—I really do—because I don’t know what I’d do without gluten in my life. Having said that, I hope you can tell that I really did approach this undertaking quite seriously this time; and I think we all know I’m not going to half-ass anything I make for my dogs despite my overall caviler attitude.

Also, I learned that while oats by themselves are gluten free they are not always by themselves. Oats are typically grown and processed with wheat and other grains which contain gluten and which also may lead to cross contamination. In order for oats to be totally free of gluten, they must be grown, harvested, and processed in fields and facilities that either only handle oats or only process other gluten-free grains. For most of us, the 99% anyway, it probably doesn’t matter and you can still claim gluten-free bragging rights even if they’re not labeled gluten-free; however, the other 1% will still need to adhere strictly to only those oats which have that label just to be on the safe side.

FYI: I mixed mine in a large bowl using a smaller bowl to measure out the individual flours, then I used a whisk to make sure they were blended well before putting it in an air-tight zip-top bag. Before using, I shook and whisked the bag again as the mixture can settle. 

As a note: these treats will be made in a facility (my kitchen) and with equipment (my KitchenAid mixer, bowls, spatula, and muffin pans) which also regularly produce items which contain gluten (bread, cakes, muffins, cookies, and other dog treats).

Sunday, August 21, 2016

About the recipe: Carrot Cake Bones


I love carrot cake; and for a while, I was obsessed with making one from scratch. Several years ago after my grandma passed away, we went through her kitchen and found her famed Angel Food Cake recipe; and it was wonderful because it was written out in her own handwriting. But while everyone was going on and on about how good it is (and it is…and I make it per her instructions every time), my mom more fondly remembered her carrot cake. However, try as we might, we could not recover grandma’s carrot cake recipe for which she would hand shred the carrots since she didn’t have nor want a food processor.

Essentially, carrot cake not only has carrots but also a fruit component (and don’t forget the cinnamon); and while most will call for raisins, the recipe I eventually settled on called for pineapple. The recipe which I found most satisfactory was in Southern Lady Magazine; and it’s heavenly… but then again, anything that has a pound of butter and cream cheese is bound to be alright, right? Well, it’s heavenly (and yes, that’s the only word that really fits); but it also kind of a bear to make—and I usually end up using two mixers and every mixing bowl in my house—and it’s still really worth it.

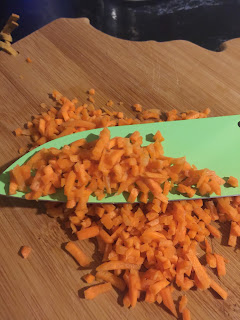
Matchstick carrots
At the end of the day, I had the idea for carrot cake treats because I needed to finally use those carrots which I forgot to add to Presley’s Pupcakes then subsequently forgot to include in my Green Treats; however, I’m kind of glad I didn’t use them before because these treats were fun and definitely worth it. Also, my mom brought me my bone-shaped cookie cutter; so I knew I wanted to make them a roll out treat to cut out the shape. Don’t worry though, this recipe is actually really simple to make and include a healthy dose of carrots and pineapple which I think your dogs will like as much as mine.

Finely chopped carrots
If you’ve ever lived with someone who has my dad’s curiosity over baked goods, a bone-shaped cookie cutter is a good investment and will save you the trouble of having to tell this person or people that what you’re making is intended for a dog. You’ll get a look which says, “Really?”, or it’ll save yourself from having to hear how bland your cookies were and how you should put a sign on your dog treats so unsuspecting passersby don’t grab them and eat them…Yes, in short, my dad thought it was basically a travesty that I’d make treats for my dogs and not for him.

Like all carrot cake recipes, it calls for carrots—which I had on hand because of my poor memory and are a healthy treat for dogs. I picked up matchstick carrots because I didn’t want the mess of shredding my own carrots; and as they’re kind of too big for these treats, I did chop them up a bit so they’d mix in a bit better. If you use fresh carrots, you’ll still probably want to give them a chop or two; however, fresh carrots are a lot “softer”—as they’re fresh, they have more of their natural moisture.

2 cups carrots
Also, if you’re using fresh carrots and shredding them yourself, you’ll want to wring out the carrots before you throw them in your mix as they’ll be too wet to use otherwise. This is the same step you’d do if you were making an actual carrot cake. You put the carrots on a clean kitchen towel (preferably one you’re not worried about turning a little orange), and then you roll the towel up enclosing the carrots. Then you take the ends and twist until there’s no more orange water coming out—I’d suggest you do this part over your kitchen sink. 

This isn’t actually as big of a mess as it may sound; and it is very essential.
And yes, I used two whole cups of chopped carrots in these treats because, well, carrot is in the title; and again, they’re a healthy treat.

Now onto the pineapple which is very pouch friendly. In fact, while checking several sources, I found that some people even let their dogs chew on the fibrous cores as a healthy treat. In moderation, pineapple can aid in digestion and is packed in essential nutrients—especially fresh pineapple. Fresh pineapple cores are high in the enzyme bromelain which not only helps reduce swelling in joints but can also help prevent cancer. Additionally, enzymes in pineapple can prevent kidney or bladder stones. Since pineapple is high in sugar, it can throw off their diet and cause diarrhea and vomiting if eaten too frequently. 

tip: use crushed pineapple and skip this step
Now, I didn’t use fresh pineapple because I was trying to make it as easy as possible; and I bought pineapple tidbits as I had it in my head that tidbits were crushed. They’re not; and that’s why I ended up mashing them up a bit with a potato masher when mixing them with the applesauce. 

Applesauce is great in dog treats; and I use it often in my treat recipes. Apples are healthy and add a bit more natural sweetness; and I use it a lot because it not only helps bind the ingredients but also aids in keeping everything moist and tender.

I mixed my applesauce with my pineapple as I needed to crush the pineapple prior to mixing in the carrots; but if went with crushed pineapple, you can just mix it all in at the same time with the egg (another binder—which is packed with protein) and the coconut oil and vanilla. Basically, all the wet ingredients go in together and mix until that egg is spread throughout.

Now with cakes, you generally mix the wet then mix all the dry in another bowl before adding it into the wet ingredients; but that’s not necessary in this case. If anything, I mixed the cinnamon in with the wet ingredients as it tends to blend better that way before I added the flour, baking soda and powder, oats, wheat-flour and ground flax seeds. Yes, I used both—and while I bought the organic aluminum-free baking powder specifically for dog treats, I hadn’t gotten around to doing the same with the baking soda; however, upon inspection of the ingredients list, there’s no aluminum in mine anyway.

Baking powder works when it gets wet and/or hot (Single acting works when wet--Double acting when it gets wet and then again when it gets hot). There’s a chemical reaction which causes carbon dioxide and makes bubbles in your mixture causing lift. Baking soda does the same thing but requires acid. My carrot cake recipe calls for both because it also calls for buttermilk; and this recipe calls for both because of the acidic pineapple and applesauce.

In the end, these ingredients are what leave these treats kind of soft and not quite as hard as commercial treats; and while you can bake them for a bit longer to get a harder treat, they’ll never be as hard as the cardboard box treats unless you burn them to a crisp. However, if you’re aiming for a firmer treat—feel free to omit both ingredients as they’re stay flat and bake harder. My boys like the softer treats, I think; or at least, it provides them a new texture and treat experience that they seem to enjoy.

All mixed up, it kind of looks like a meat loaf, doesn't it?
Now, oats and flaxseeds are not a part of any carrot cake recipe I’ve ever seen; and while ground flax seeds bring a nutty flavor (most carrot cakes have nuts, but nuts can disrupt your dog’s digestion and could actually be poisonous) and have other health benefits, the oats were actually included because I think they make the treats look more appealing. Plus, they add a bit of healthy fiber and interesting texture to the mix. I mostly included both because I have both on hand—and I tend to use both in a lot of my treats. But if you don’t have them on hand, just increase the amount of wheat-flour you use to make up the difference.

This dough should be stiff; and in fact, it was so stiff that it ended up bending my spatula—so watch out when mixing. In the end, I finished mixing this recipe with my hands. 

be sure to flour your rolling surface
With all the fruit—applesauce and pineapple, this dough is kinda sticky; and you’ll need to dust your rolling surface fairly well prior to turning out your dough. As my kitchen lacks counter space, I actually roll out dough on my cook top stove since it’s the largest flat surface in my kitchen; and as having the oven preheating tends to warm the surface a bit, I don’t start the oven until after I’m done rolling and cutting my treats. FYI: the glass cook top is a lot easier to clean up than my counter top ever was; and if anything ever sticks, it’s easy to use an off-set spatula to pull up the treats.


flour your cutter and space your cuts close!
When rolling out cookies or these dog treats, you’ll want to cut out your shapes as closely as possible to get the most out of the fewest rollouts. The more you rollout your dough, the more gluten will develop in the flours…plus, it’s fewer steps that way. You will have to re-roll once or twice at any rate; but less is better. And when you get down to a small scrap of dough, I always just free form it into a ball and those are the treats my boys get first after they’re done.

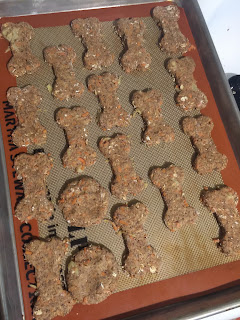
About to go into the oven
Once you’ve got your treats cut out and on the pans, put them directly in the 350 degree oven and bake for 18-20 minutes. I rotated my pans about halfway through because I put both in at the same time; and I exchanged top for bottom when I rotated. My treats were firm to the touch with a slight spring after 18 minutes; but weren’t brown, per say—the whole-wheat flour and flax seeds make the dough dark to begin with, so it’s hard to tell if they’re brown or not. Again, if you want a harder treat, feel free to leave them in the oven for up to 25 minutes—just be sure to check on them to make sure they’re not getting burned. 

Right out of the oven
After they were baked to my liking, I took them out of the oven and let them cool for about two minutes before I transferred them onto a wire rack to finish cooling. If you opt to make the icing, you’ll want to let them cool completely—which means that they no longer feel warm at all. Warm treats will melt icing; and you’ll end up with a big ole mess.

The icing was fairly simple to complete; and while traditional carrot cake would call for cream cheese icing, I didn’t have cream cheese on hand nor did I want to try to think about how to make it not messy on the finished bones. I wanted an icing that sort of dried hard, so I did a simple Google search and wound up finding the one I used. It calls for yogurt—which has a sort of tanginess like cream cheese; and couldn’t have been easier to make and spread.

I only modified it slightly, so I can’t take full credit. The original recipe called for Greek yogurt, tapioca starch/flour (which I had on hand due to my Asian market adventures and my quest for the perfect coconut cream pie—FYI: Tapioca starch is the same thing as Tapioca flour), and milk. However, I’d purchased a rather large container of non-fat plain regular yogurt, so I skipped adding the milk (which essentially makes it more runny; and since regular yogurt is more runny than Greek yogurt, it works out), and added cinnamon which my dogs love and would kind of mimic the flavor in the treat (plus, my favorite carrot cake recipe does).

Whisk smooth
All in all, the icing is super simple—just whisk together all ingredients until smooth, and then spread on the treats with a butter knife or offset spatula; and it elevates them just a bit. Out of the oven, the treats look pretty good with the oats and flecks of pineapple on their surface; but when they’re iced, they look extra special.

My boys got them both ways—plain and iced; and I think they like the iced versions a little bit more than their slightly more boring counter parts. Once it’s dry, you can stack the treats and they don’t make a mess at all.


Both my boys seem to like these treats a lot; and even though they will eat about anything that comes out of my hand, I think they do really enjoy them. Also, I gave some of the un-iced version to a friend with two dogs. One of her dogs seemed to enjoy them a lot, also; and the other doesn’t really like carrots—and clearly doesn’t have good taste in treats anyway (that dog is far too skinny of a dog anyway). My neighbor girl also received some; and her girl Clementine seemed to like them as well.

All iced and ready to eat
For me, this treat recipe was a lot of fun to make; and I found it super simple. Plus, I like to make different treats to mix it up for the boys—I don’t like the same kinds of cookies over and over, and I have an inclination that Presley and Jesse don’t either. It keeps them guessing at least.


As always, feel free to email me or contact me on the social media links to the right; and follow Jesse (whose birthday is at the end of August and whose tastes I’ll be catering to in my next treat recipe) on Twitter @Jdawg_yellow.  Get the recipe below, or by clicking here.


The boys in the yard--yes, the photo is moving